DHCP Server Configuration – We are using two windows server machines for implementation. Eiheducation.in is our DHCP server with static IP address 192.168.0.5 and Eihstore.com is a client for DHCP. Eiheducation is configured with ADDS and DNS roles.
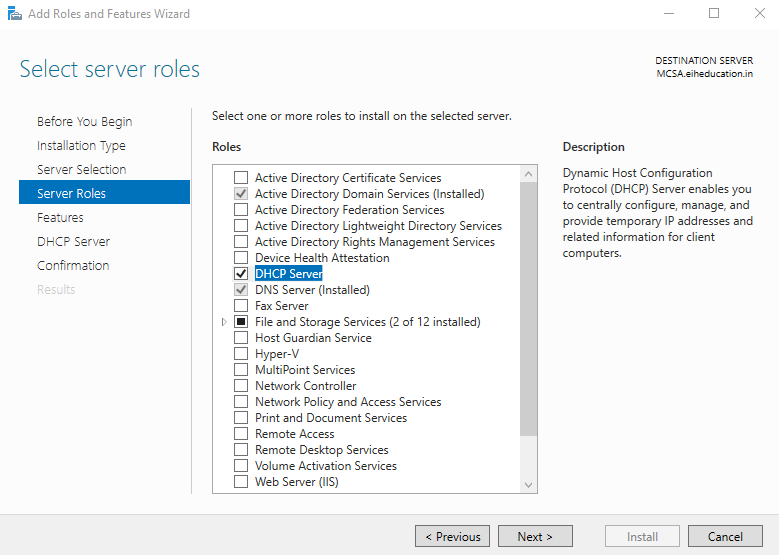
Install the DHCP role on Eiheducation.in the machine. This will be the first machine.
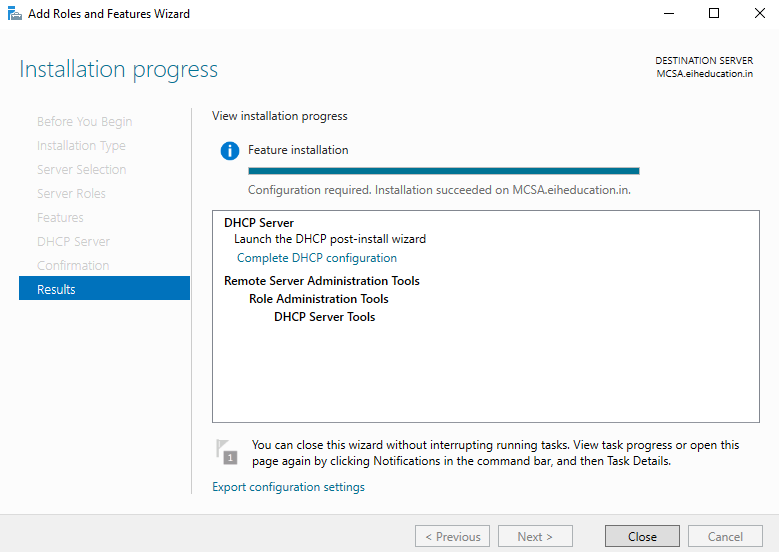
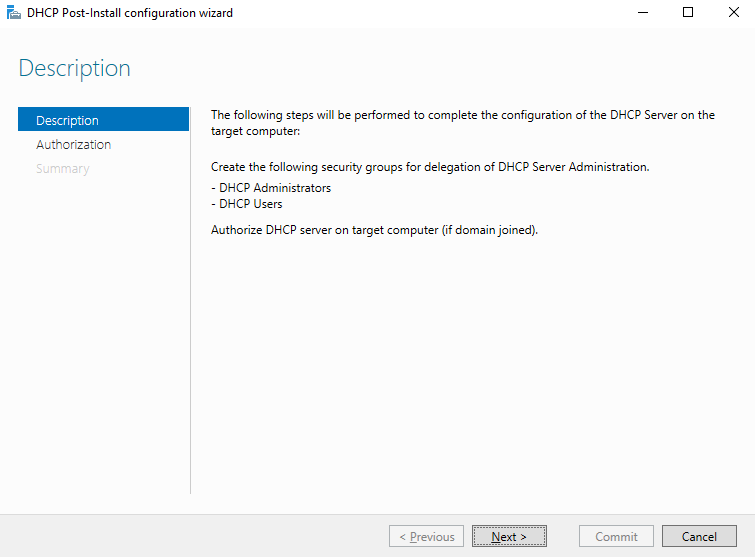
DHCP Server Configuration – On the final page, select the hyperlink Complete DHCP configuration before closing the wizard.
Grammarly – Best Free Grammar checker | Spelling checker | Mistake-free document writer for Laptop/Desktop
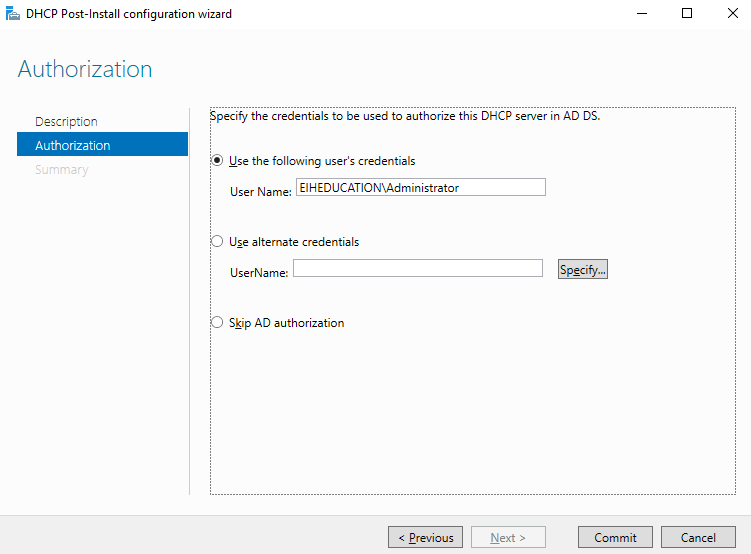
Authorization wizard will appear. Press Next Button.
Use proper credentials for Authorization.
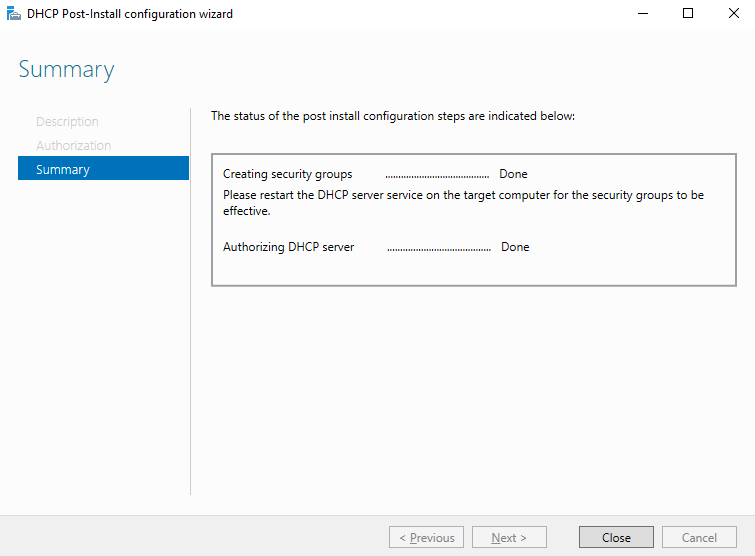
The authorization will complete once we press the close button.
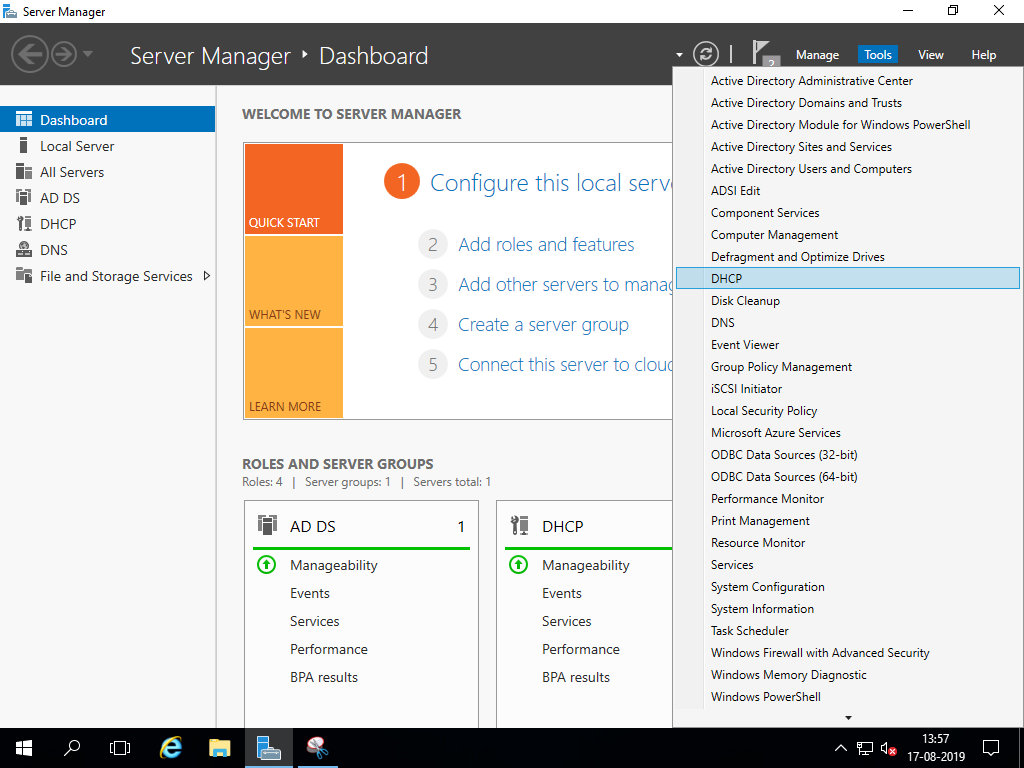
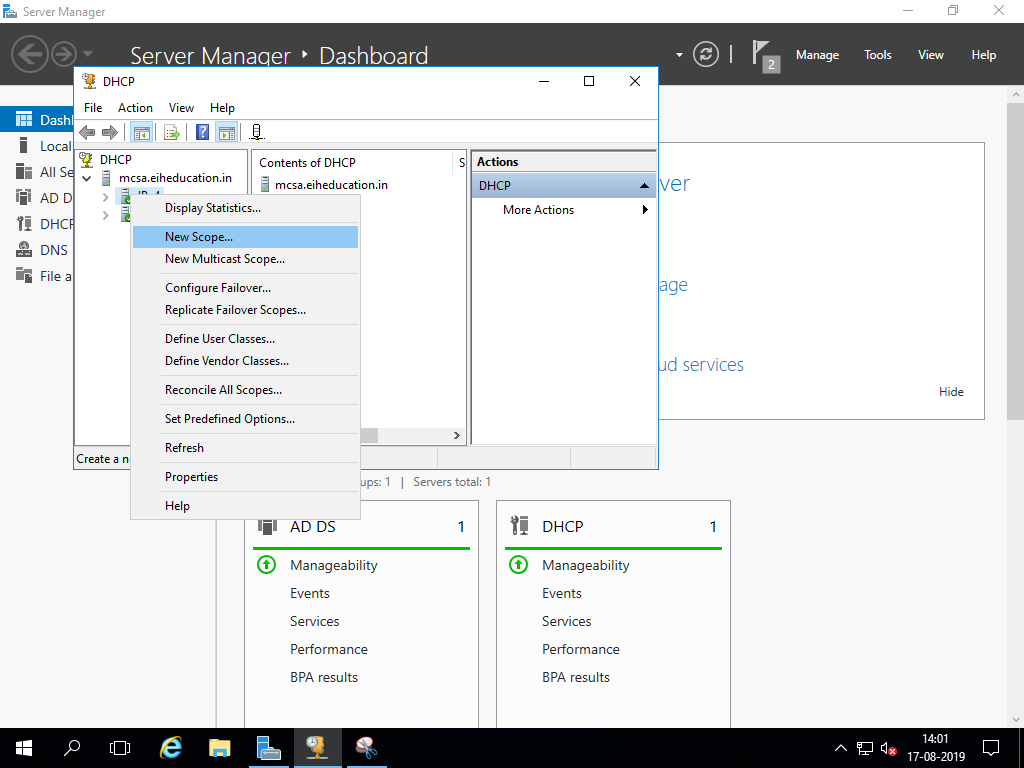
Go to Dashboard, select Tools menu, and open DHCP.
In the DHCP console, Right-click in IPv4 and select the New scope.. option.
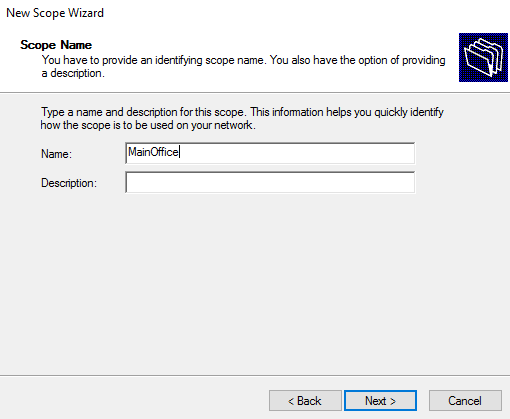
In New Scope Wizard, Specify the name of the scope,
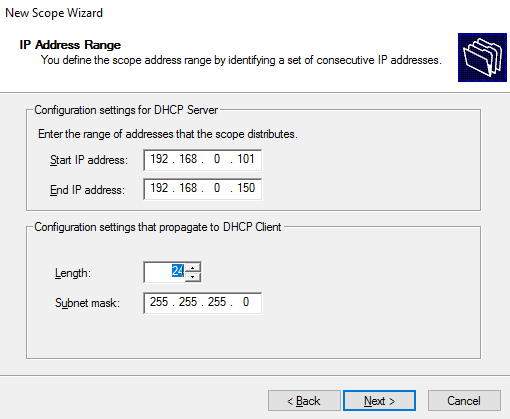
Specify Address Range and Press Next.
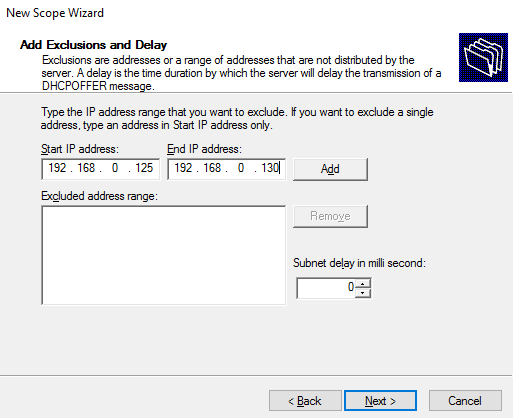
We can add exclusions, it is optional.
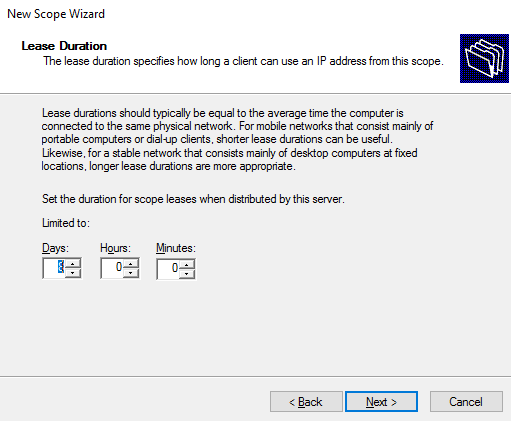
We can select Lease duration as required.
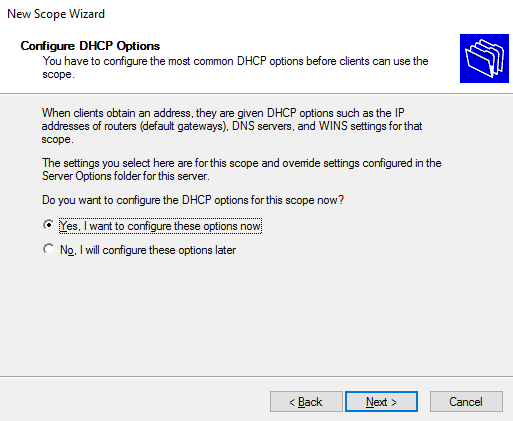
For configuring DHCP options, select yes, I want to configure these options now.
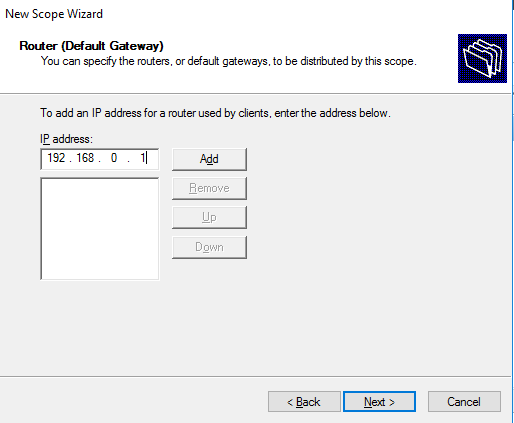
Add a Gateway IP address for the network.
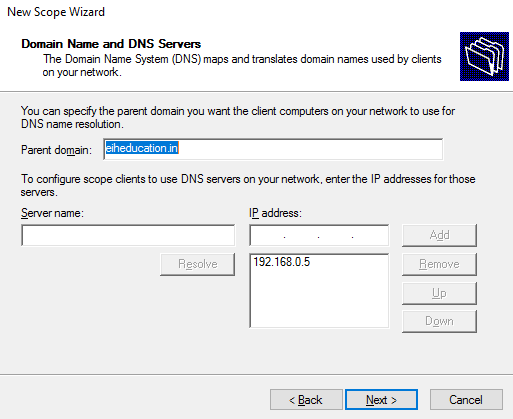
The domain will be automatically selected. We may add multiple DNS servers.
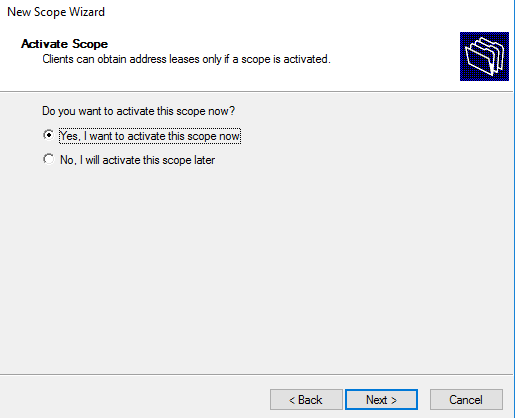
Leave WINS server configuration blank. Select the option ‘Yes, I want to activate this scope now.’
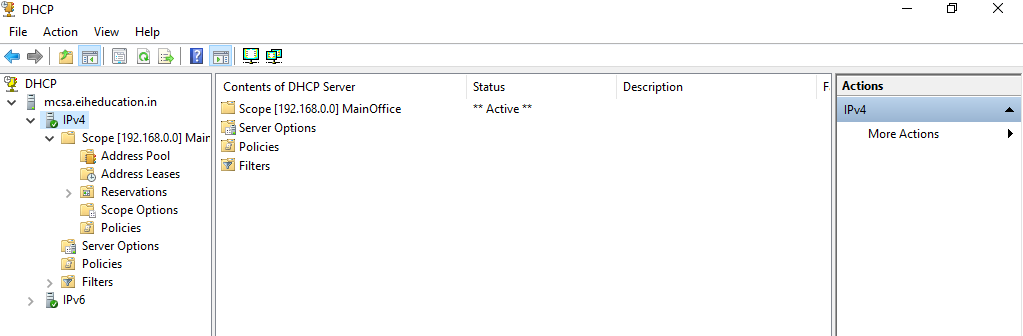
Once the wizard is complete, we can see Scope under IPv4. You may see an exclamation mark on the scope. We may have to refresh the window several times to get the scope properly activated and running.
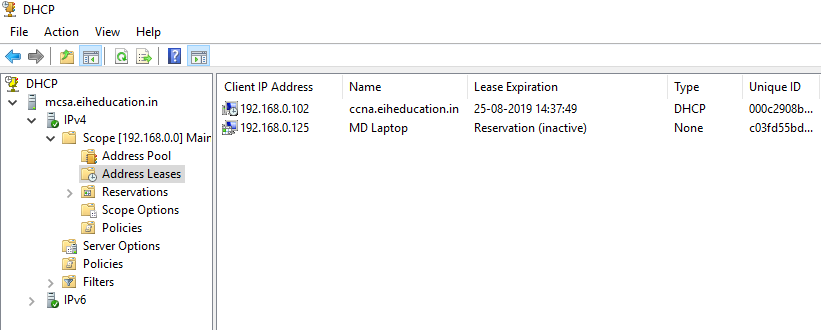
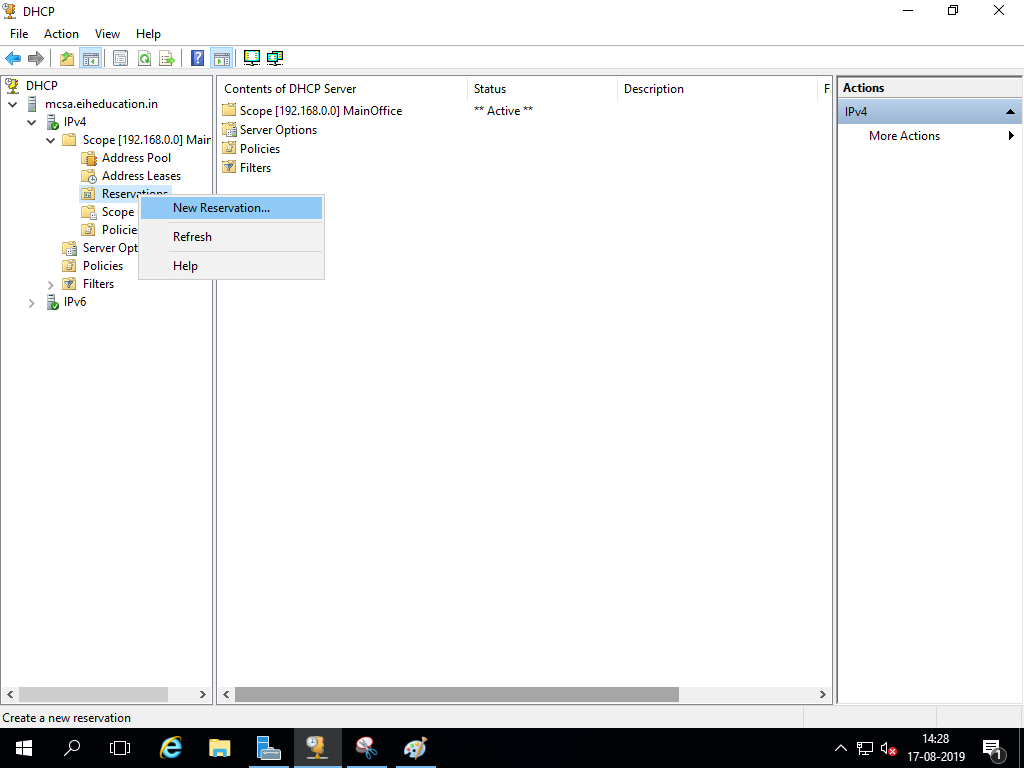
IP addresses can be reserved for a particular device on the network. Right-click on Reservations container. Select New Reservation.
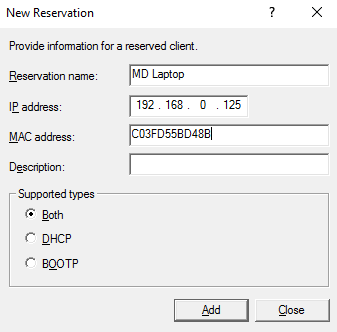
Specify Reservation name, IP address, and MAC address of the device,
And Press Add button.
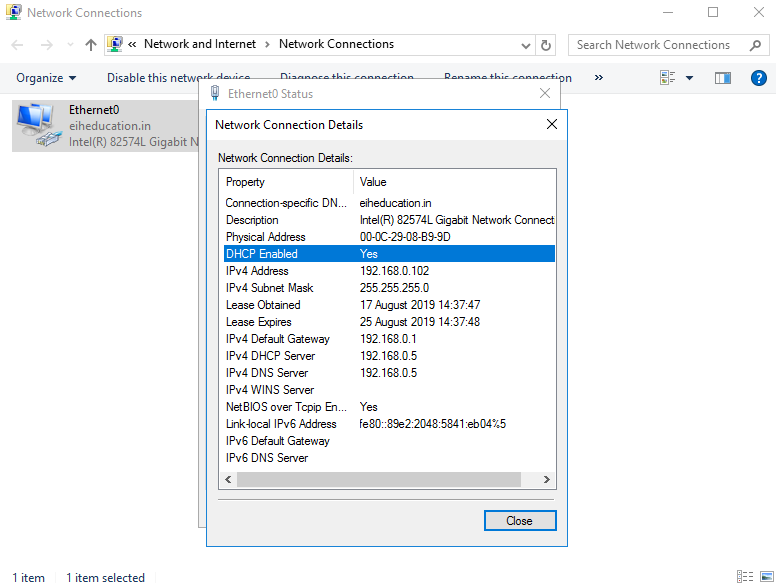
On Eihstore.com machine opens IPv4 properties select Obtain an IP address automatically.
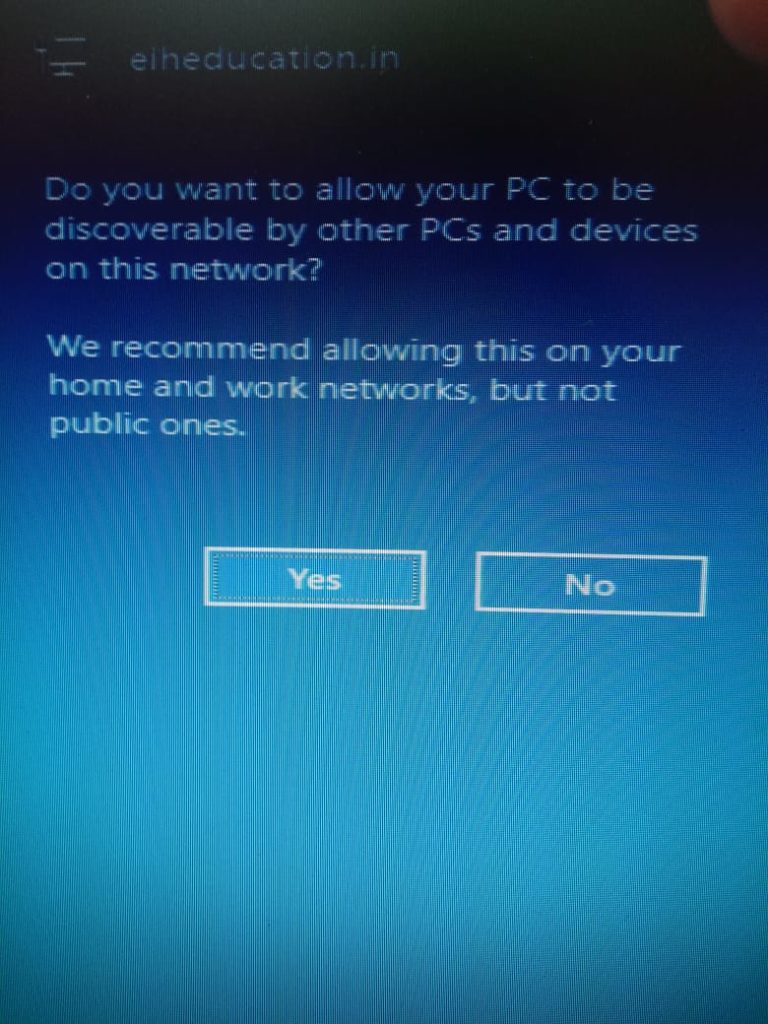
On Popup select Yes for Network Discovery Option.
We can see the details of IP configuration on Eihstore.com machine
Address Leases can be seen in the DHCP management console.