Active Directory Certificate Services – Implementing Enterprise Root CA
On MCSA.eiheducation.in, install the Active Directory Certificate Services role.
Open Server Manager and then click on “Add roles and features”. On Select Server roles, click on Active Directory Certificate Services and complete the installation.
On Server Manager, in the notification click post-deployment configuration.

ADCS configuration Wizard will open, specify the credential as “domain\administrator” and click on next.

In Role Service, click on “Certification Authority” in “ADCS Configuration” then click on next.

In Setup Type, check that “Enterprise CA” is selected and then click on next.

In CA Type, Check “Root CA” is selected and then click on next.

In Private Key, select “Create a new private key” type and then click on next.

In Cryptography for CA, we will change key length “1024” then click on next.

In CA Name, specify the “common name for this CA” and note it done and then click on next.

In Validity period, click on next.

In CA Database, click on next.

In Confirmation, click on configure and after the role is configured successfully close the wizard.

Now we have to create a Certificate for that, open Server Manager, go to Tools, and then click on Certification Authority.
Expand eiheducation-CA-CA, double click on Certificate Templates, and right-click select Manage.

Then a Certificate Templates Console will open, look for the web server in Templates Display name, right-click on it and click on Duplicate Template.

Properties on New Template will open; click in General Tab, under Template display name:
Assign name e.g. 1st Web Server. Keep Validity and Renewal Period as default. Click on “Publish certificate in Active Directory” and also click on “DO not automatically reenroll if a duplicate certificate exists in Active Directory (check box)” in “Properties of New Template” then click on Apply.

Then go to the Compatibility Tab and under Certification Authority change it to Windows Server 2008 and under Certification recipient change it to Windows Vista / Server 2008, then click on Apply.

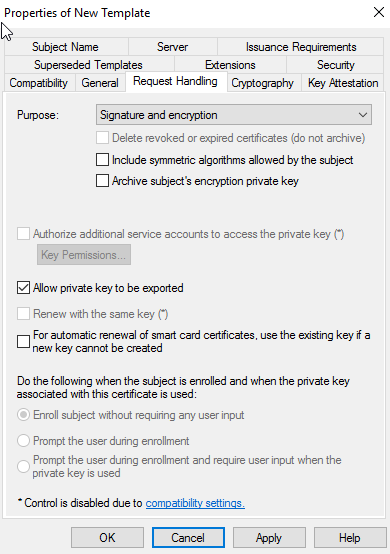
Now go to the Request Handling tab, Under Purpose select Archive subject’s encryption private key, a Changing Key Archival Property pop up will appear click on OK and wait for the option to get selected. Select Allow Private key to be exported and then click on Apply.

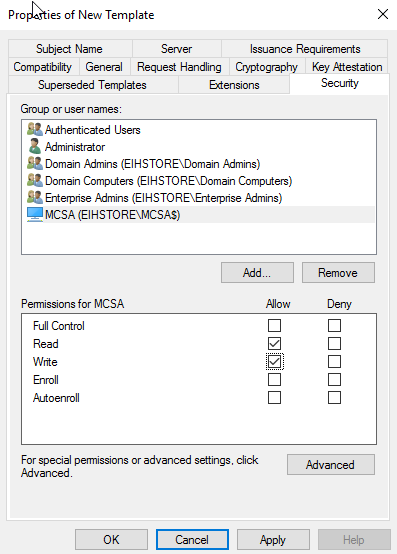
Go in Security Tab, click on Add then click on Object Types – select computers then click on OK. Type in the Web Server Name, in our case “MCSA” then click on check name and OK.
Assign Read and Enrol permission and then click on Apply.

Then go to Superseded Templates Tab, click on Add – select Web Server – click on Ok, then Apply.

Go to Issuance Requirements, click on CA certificate manager approval then click on Apply.
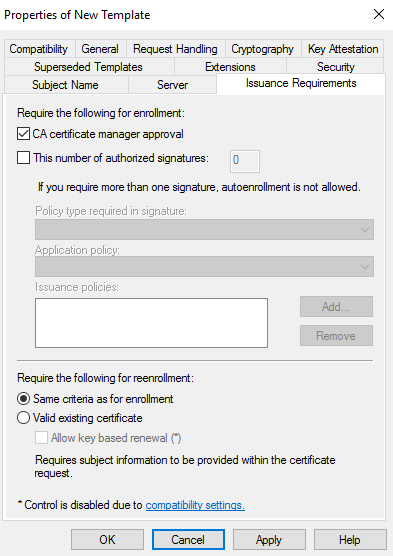
Then just go to Subject Name, to check the setting, no changes are to be done Click on Apply and Ok.
Again in Certificate Templates Console, select Computer and right-click and select Duplicate Templates.

Then in General Tab, under Template Display name type 1stComputer and select “Publish Certificate in Active Directory” and “Do not automatically reenroll if a duplicate certificate exists in Active Directory”, click on Apply.

A Resulting Changes popup will appear, click on Ok.
Then go to the Compatibility Tab under Certification Authority keep it as Windows Server 2003 and under Certificate recipient change it to Windows Vista / Server 2008, then click on Apply.

Now go to the Request Handling Tab, Select Allow private key to be exported and then click on Apply.
Go to Security Tab, under Group or Username, select Domain Computer, and in permission click on Read and check for Enrol.
Click on Add then click on Object Types- select Computer and then click on OK. Type in the Web Server Name, in our case “MCSA” then click on check name and Ok.
Assign Read and Enrol Permission and then click on Apply.
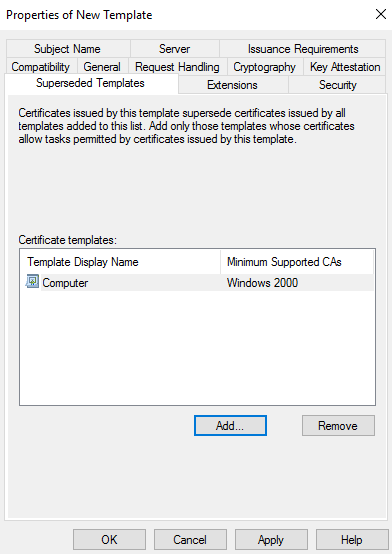
Then go to Superseded Templates Tab, click on Add – Select Computer – Click on Ok then apply.
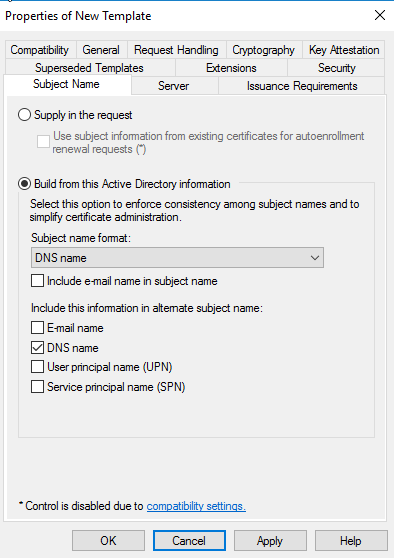
Then just go to Subject name, click on “Build from this Active Directory information”, under subject name format choose “DNS name”.
Click on Apply and ok.
Close the “Certification Templates Console” Window
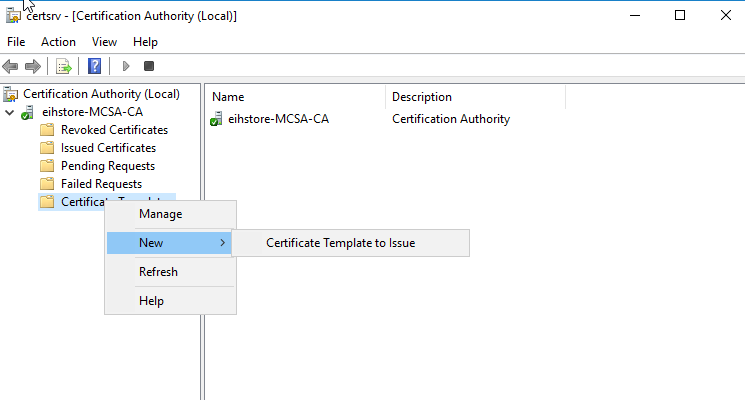
Again go to Certificate Authority Window, right-click Certificate Templates – go to New – click on Certificate Template to issue.
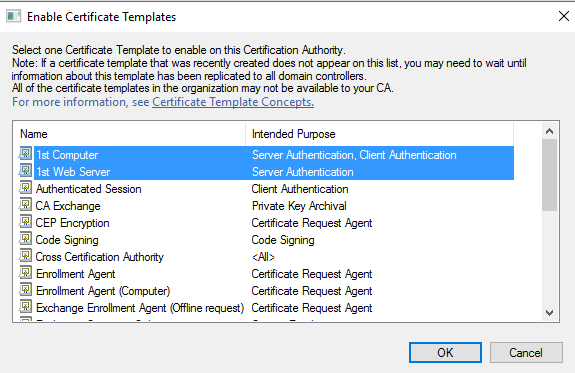
In Enable Certificate Templates window, select the created Certificate Template” 1st Web Server” and “1stComputer and click on ok.
Close the Certificate Authority Window
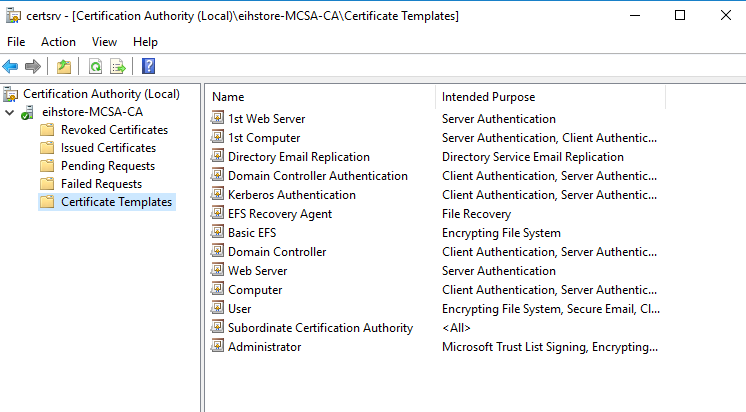
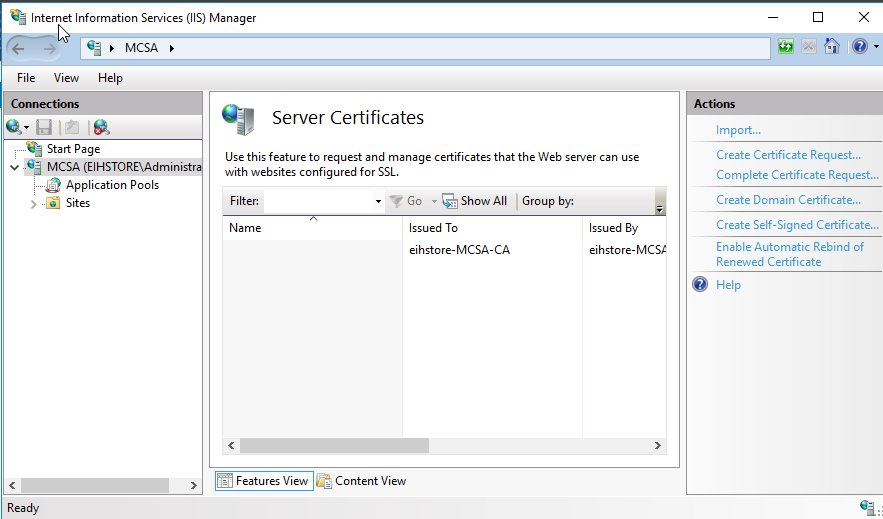
Now Go to IIS (Web Server) and create domain certification. Open IIS Manager, select MCSA (CERT\Administrator), double click on “Server Certificates”.
In Actions Panel, click on “Create Domain Certificate”.
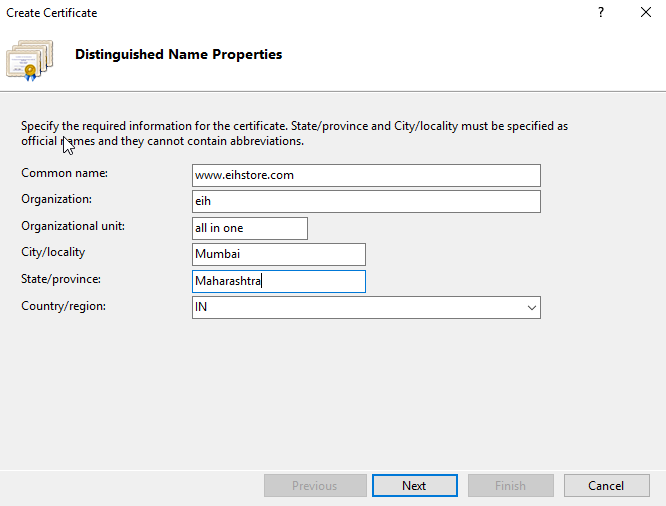
A create Certificate Window will appear, fill in the details as required.
Online Certification Authority, Specify Online Certification Authority and assign a friendly name and click on Finish.

Expand DOM (CERT\Administrator) – Sites – Default Web Site – In Action panel, click on Bindings… Site Binding Windows, click on Add.
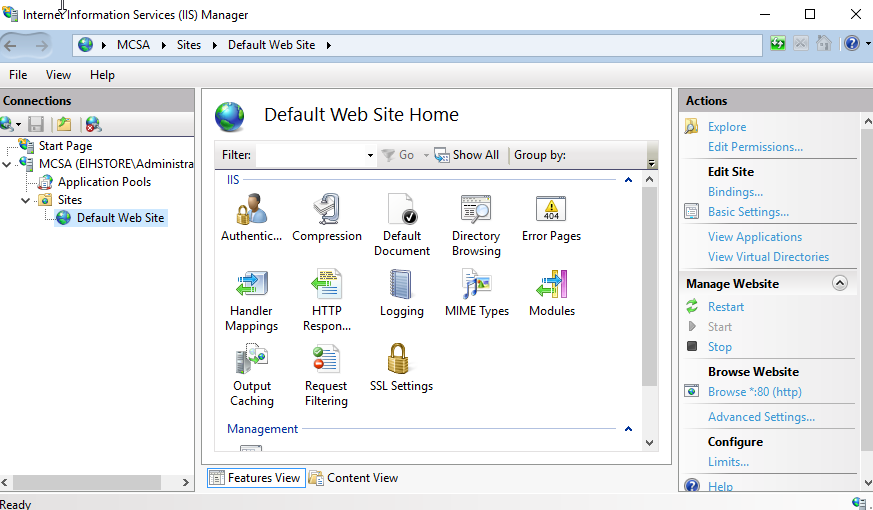
In Add Site Binding, under Type select HTTPS and assign Hostname and select SSL certification as root CA, click on ok.
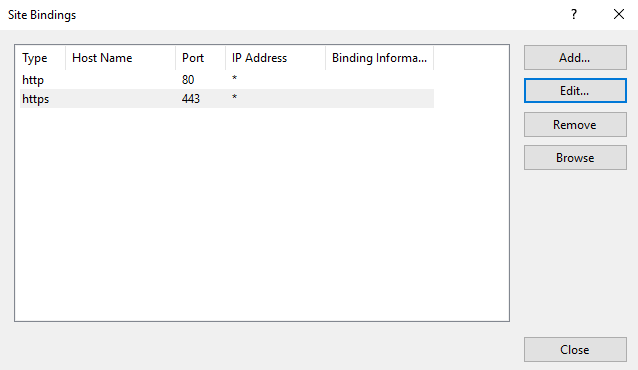
Then assign in Default Web Site, double click on SSL Settings.
In SSL Settings, select Require SSL and under Client, Certification click on Accept, then click on Apply.

Restart the IIS service, as shown below multiple times to update it.
Now open Group Policy Management, click on “Forest: eiheducation.in” – click on “Domains” – click on “eiheducation.in” – click on “Default Domain Policy”, right-click select Edit.
Expand Computer Configuration\Policies\Windows Settings\ Security Settings\Public Key Policies – Double click on “Certificate Services Client – Auto-Enrolment”
In Configuration Model, choose Enabled – click “Renew expired certificates, update pending certificates and removed revoked certificates” and update certificates that use certificate templates” then click on Ok.

Then run gpupdate /force command to update the changes.
On the client, log in with a user account. Open Internet Explorer access the IIS server i.e. http://eiheducation.in Click on Continue to this website (not recommended).

Now add Certificate to the client. Open MMC console – click on Add or Remove Snap-Ins – select certificate – click on Add. Select Computer account then click on Next. Click on Finish. Click on Ok.

Expand Certificates – personal – right-click – All Tasks – Request New Certificate.

Certificate Enrolment window will appear, click on Next.

On Select Certificate Enrolment Policy, click on next.

Select the 1stComputer and click on Enrol.

On Certificate Installation Results, click on Finish.
Open Internet Explorer access the IIS server i.e. http://eiheducation.in.

Check Out the Headphones – 50% to 70% Off
Check Out the Earbuds – 50% to 70% Off
Grammarly – Best Free Grammar checker | Spelling checker | Mistake-free document writer for Laptop/Desktop
Check Out The LAB Configuration eBook – Class A, Class B, Class C, MiN worth $78 Get at $18

