DNS Server – Installation of DNS Server in Window server 2016
Open Server Manager Click on Add roles and Features
Click on Next
Click on Role-based or feature-based installation, Click on Next
Select a server from the server pool, click on Next
Select DNS from the List
Click on Add Features
Click on Next
Click on Next
Click on Install
Wait for the Installation
Close the window when Installation Succeeded
Implementing and Configuration DNS Server role: In our scenario, we assigned the computer name as champ. An IP address is set to 172.30.10.1 and the preferred DNS is given as 172.30.10.1. We are configuring Domain ‘eihtech.com’.
We have successfully installed the DNS server on this machine.
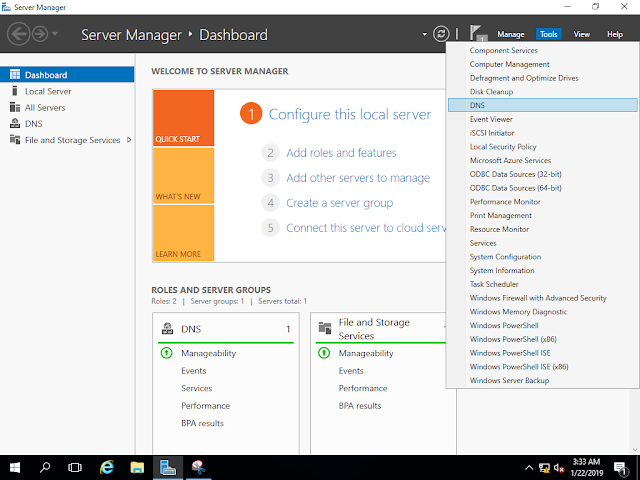
Go to the Tools menu on Dashboard and select DNS. It will open the DNS Manager window. Alternatively, we can run dnsmgmt.msc command to open the DNS Manager.

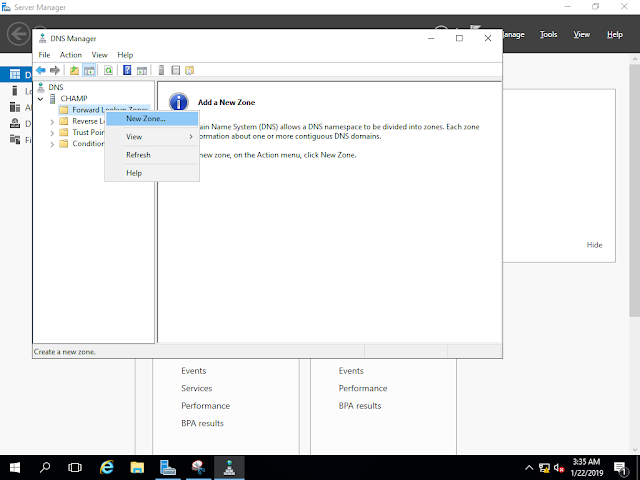
Under DNS go to the champ. Right-click on forwarding Lookup Zones and select New Zone.

Click on Next
In New Zone Wizard, in Zone Type select Primary zone.
In Zone Name Specify eihtech.com
Zone File eihtech.com.dns will be created in Windows\system32\dns folder
In Dynamic Updates select Allow both nonsecure and secure updates.
Click on Finish
New Zone eihtech.com will be created. We will be able to see SOA and NS records.
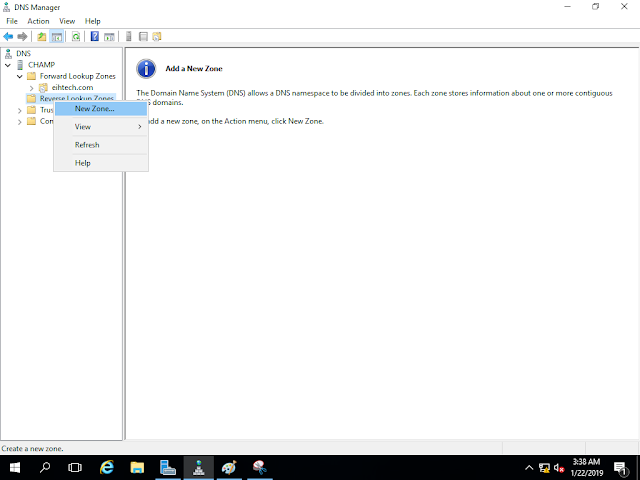
Right-click on Reverse Lookup Zones select a new zone.

Click on Next
Select Primary Zone in Zone type.
In Reverse Lookup Zone Name select IPv4 Reverse Lookup Zone.
In-Network ID box type 172.30.10 and press next.
A new file will be created in windows\system32\dns folder to save the reverse lookup database.
On the Dynamic Updates, page select Allow both nonsecure and secure dynamic updates.
Click on Finish
On completing the wizard Reverse Lookup Zone will be created.
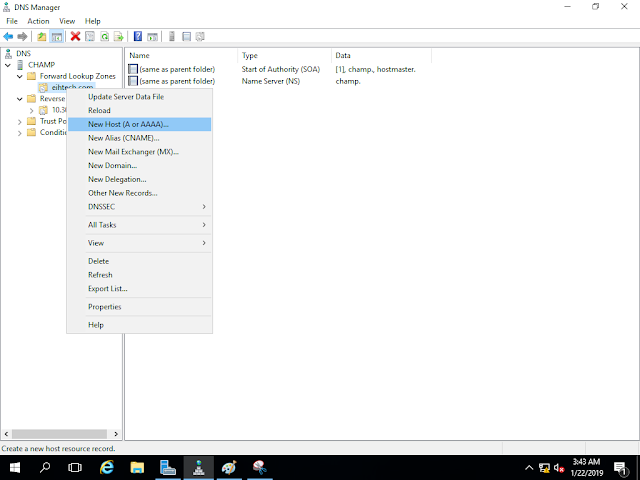
Go to eihtech.com and create a New Host record.

Specify the name champ and IP address 172.30.10.1. select create associated pointer record checkbox.
One host record will be added to eihtech.com domain.
A similar one-pointer record can be seen in Reverse Lookup Zone.
Command nslookup is used to verify DNS connectivity from the network. You may assign the IP address of the same network to another computer on the network, assign 172.30.10.1 as Preferred DNS. And run nslookup command. The same output can be seen.


