
Windows Deployment Services
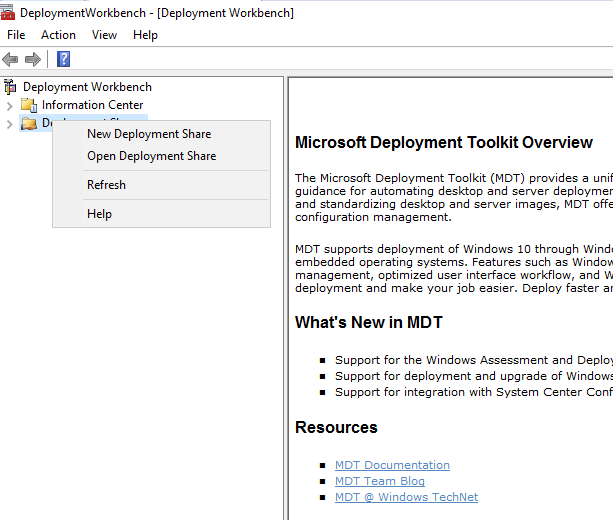
Windows Deployment Services – Create a new deployment share – Run Microsoft deployment toolkit and in deployment workbench, right-click on deployment share and select add new deployment share. Desh there is a network path from which WinPE (preinstallation environment) will download the installation images if you choose network installation.
In the configuration, wizard select a part to the deployment share and click on next

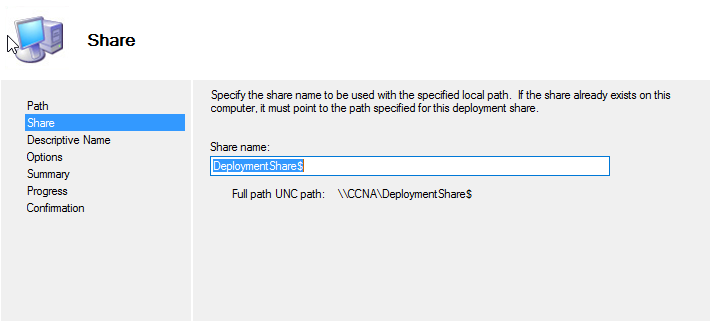
On share select the name of the share and click on next
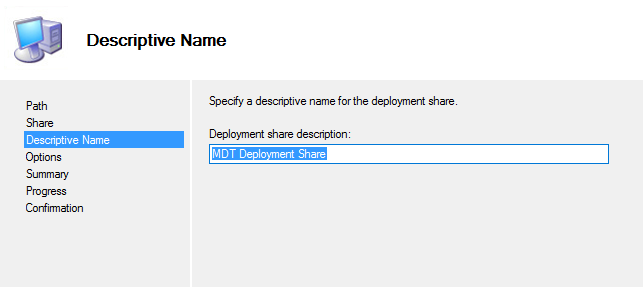
On Descriptive name specify the deployment share description and click on next
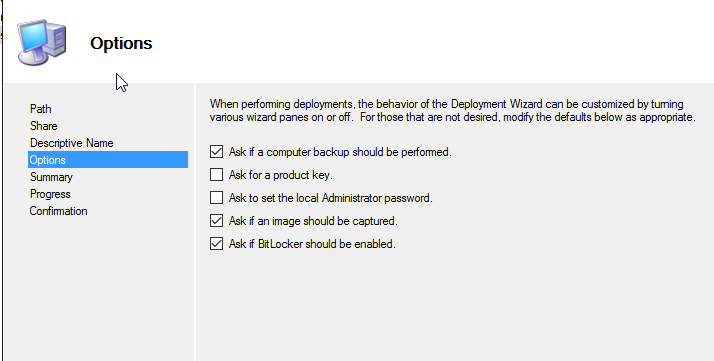
And the option is green we can choose what we want to show in the deployment wizard. After selecting the appropriate options click on next.
In summary, check the detail and click on next.
Next, the process will start, wait for the process to get complete
A confirmation you can play can finish

Deploying image
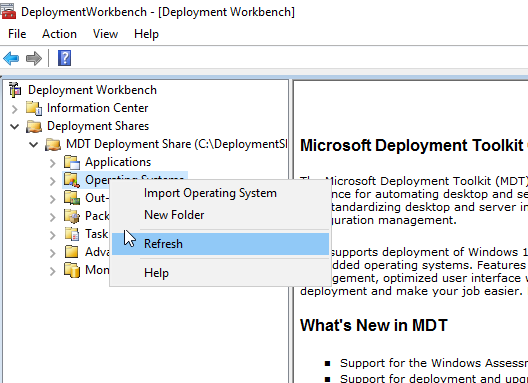
After a successful deployment of a new deployment share, now you have to import the operating system to the deployment share. Insert the Windows Server 2016 installation media and expand the newly created deployment share, right-click operating system, and select import operating system.
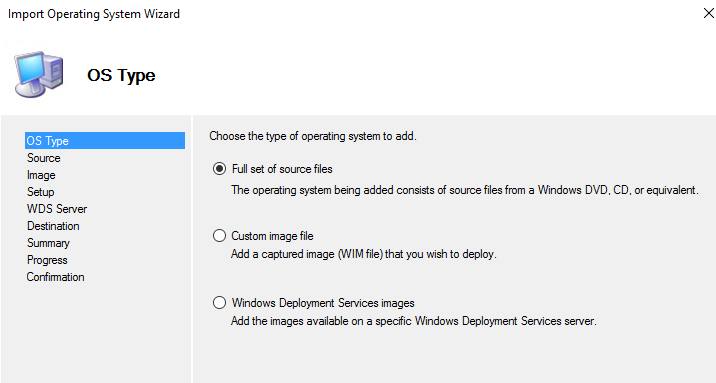
In the configuration wizard, choose the type of operating system to add. From the operations let a full set of the source files and click on next.
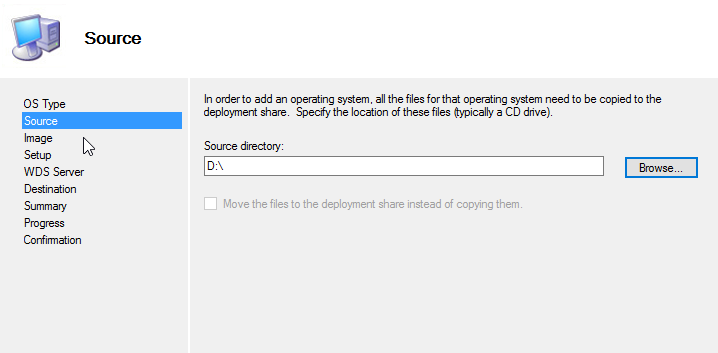
Open source, specify the location of the installation media, and click on next
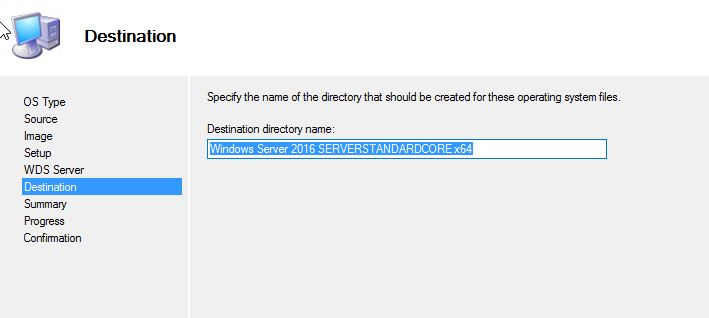
On destination, specify the destination directory name or keep it as default and click on next.
In summary, check the details and click on next.
The next process will start, wait for the process to get complete.
on confirmation click finish.
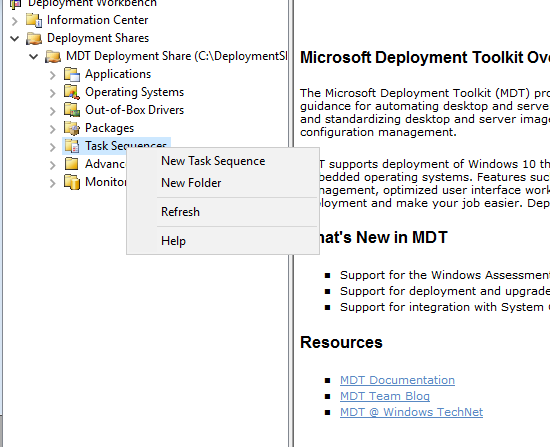
Create the deployment task sequence
Task sequences are an important part of the deployment process. Text indirectly defines all step of the deployment.
Go to the task sequence, right-click and select a new task sequence.
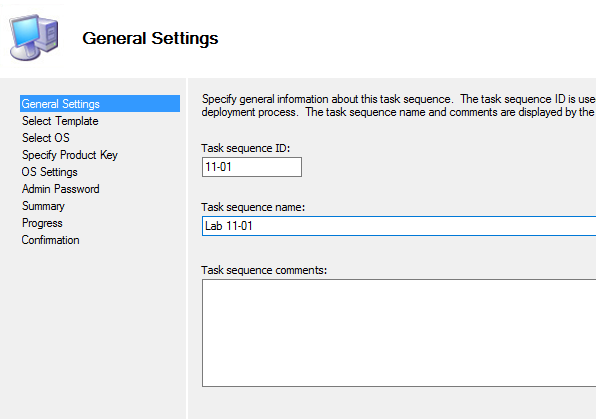
In configuration wizard, on general setting undertaker’s sequence IDs, specify the ID and under task, sequence name specifies the name, and you can specify the task sequence comments. After specifying all the options click on next.
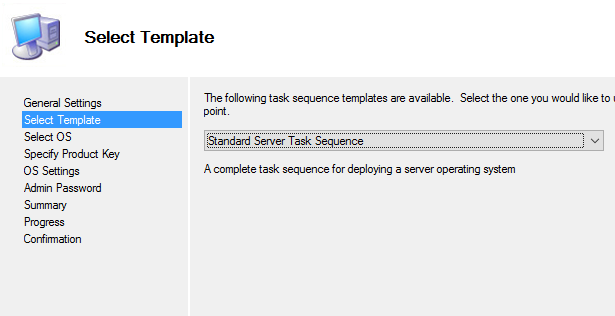
On the select template, from the dropdown select standard server task sequence and click on next
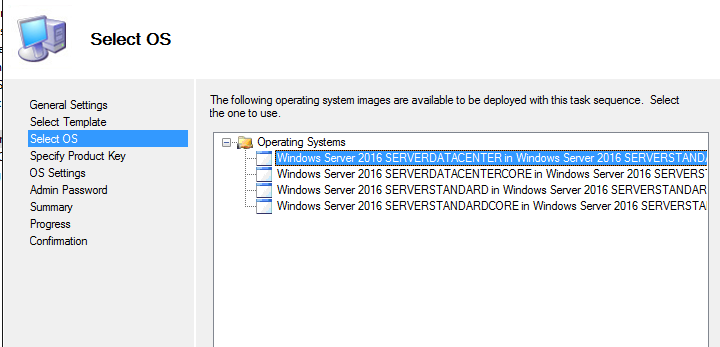
On select OS, select the operating system image that you want MDT to deploy and click on next.
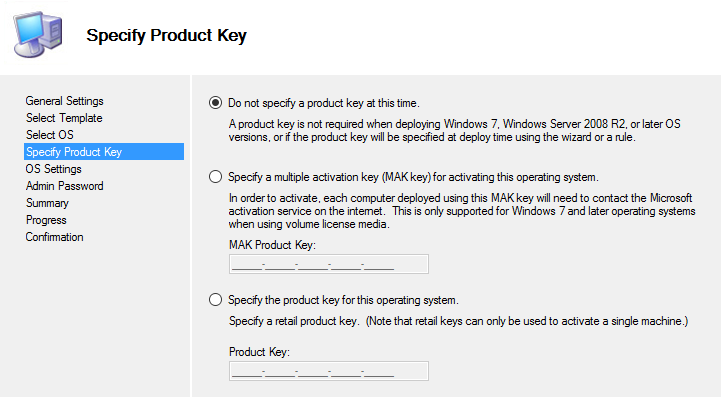
Unspecified product key, select do not specify a product key at this time, and click on next.
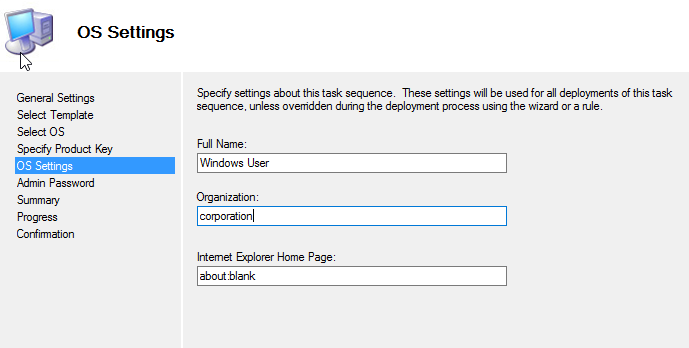
On OS settings, specify the full name and organization and click on next.
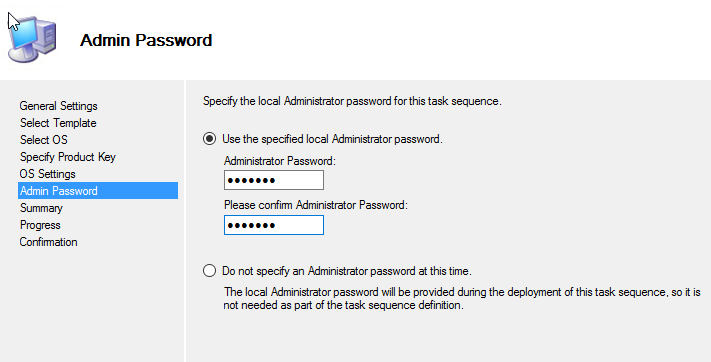
On Admin password, select use the specified local administrator password and assign the password and click on next.
For a summary check the details and click on next.
Next, the processor will start to wait for the process to get complete.
On confirmation click finish.
Creating setting of the deployment share
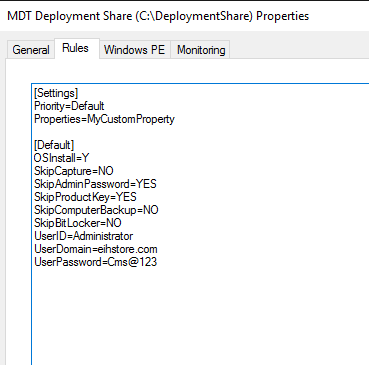
Select the newly created deployment share in our case MDT deployment share, right-click and go to the properties. Go to the Rules tab and at the end add the following:
UserId = Administrator
UserDomain = (domainname)
UserPassword = (AdministratorPassword)
Click on edit bootstrap.ini and also add this information in the bootstrap.ini file at the end of the fil
Windows Deployment Services – Update deployment share
Now right click on MDT deployment share and select update deployment share

In the configuration wizard, select optimize the boot image updating process and click on next.
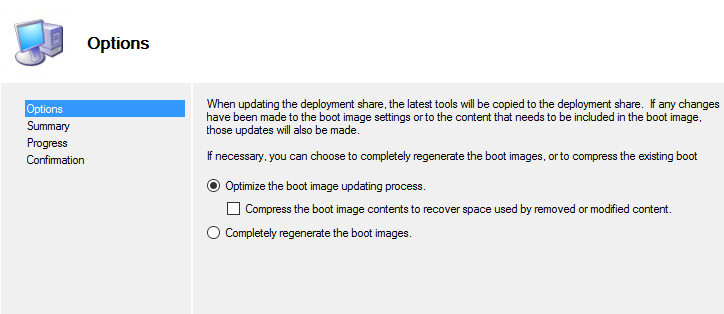
In summary, check the details and click on next
Next, the process will start to wait for the process to get complete
On confirmation click finish
Enable monitoring
Select the newly created deployment in our case MDT deployment share right click and go to the properties. Go to the monitoring tab and select enable monitoring for this deployment share and click on ok.
Deploy the image on the client
1-After the completion go to C: drive and go to the deployment share. You will find both folders in which a bootable disc image file name LiteTouchPE_x64 is created which you can write on CD or can create a USB bootable media. Use this LiteTouchPE_x64 image to border the machine.
After the image has booted up we can choose keyboard layout and configure the IP address. Now we can start a deployment wizard by clicking on the deployment to install a new operating system
2-On task sequence flag data sequence we which you deploy and click on next
3-Computer details specify the computer name and all the details need to join to the domain and click on next
4-On local and time specify the local and time preference and click on
On BitLocker specify the BitLocker configuration and click next
On Ready, Click on begin to start a deployment
5-The installation process will start and after completion, you can operate your deployed operating System.
Check Out the Headphones – 50% to 70% Off
Check Out the Earbuds – 50% to 70% Off
Grammarly – Best Free Grammar checker | Spelling checker | Mistake-free document writer for Laptop/Desktop
Check Out The LAB Configuration eBook – Class A, Class B, Class C, MiN worth $78 Get at $18