
Windows Server 2016 Certificates – Configure a CA for key archival
Windows Server 2016 Certificates – On eihstore.com, open your certification authority snap-in, right click certificate templates and click Manage.

In Certificate Templates Console, right click the Key Recovery Agent certificate template and select Duplicate Template.

In General, specify the Template display name and click on apply.

In Security, select administrator and click on Enroll, make sure read and write permissions are also selected and click on Ok.

Once the template is created close the Certificate Templates Console.

Now we need to configure the CA to issue the new certificate template. In Certification Authority, right-click Certificate Template, click New then click Certificate Templates to issue.

In Enable Certificate Template, select the newly created template and click on Ok.

Close the Certificate Authority console.

Open certificate console, in Run type certmgr.msc, right click personal, select All Tasks and then click on Request New Certificate.

On Certificate Enrollment Wizard, click next.

On Select Certificate Enrollment Policy, click next.

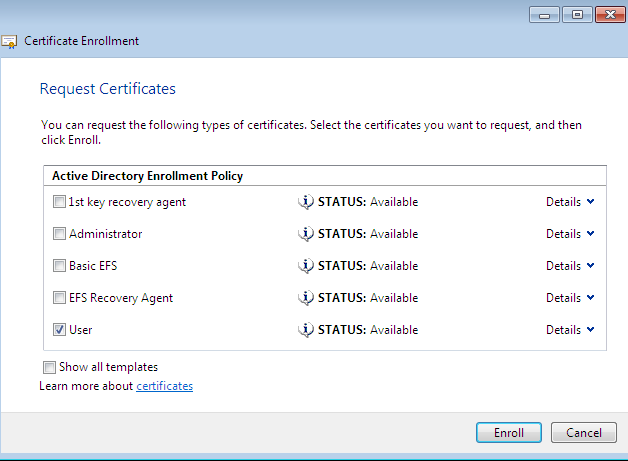
On Request Certificate, select the newly created Key Recovery Agent and click on Enroll.

On Certificate Installation Results, click Finish.

Note that it didn’t issue the certificate – the status is Enrollment Pending. Now, go back to your Certification Authority console and click on Pending Requests. You should see a pending request for the certificate you just enrolled in. Right-click the certificate, click on All Tasks, and then issue. The certificate is now issued.

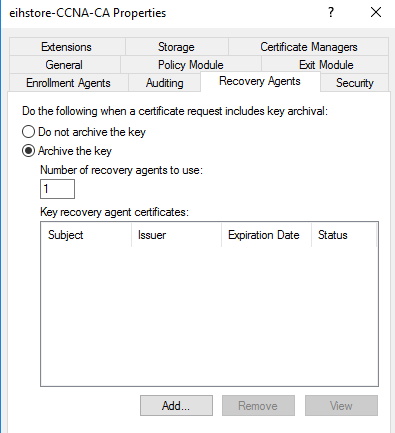
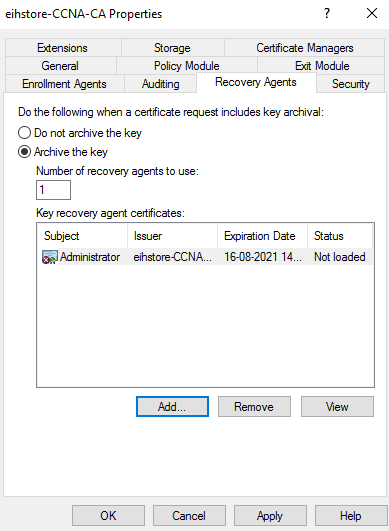
Now, right click the CA and go to Properties and select the Recovery Agents tab. Select Archive the key, select the number of recovery agents to use as per your requirement, and click Add and select the certificate which was issued to your chosen user.
On Windows Security click ok.
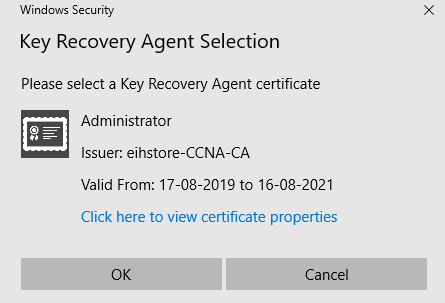
On Recovery Agent click ok
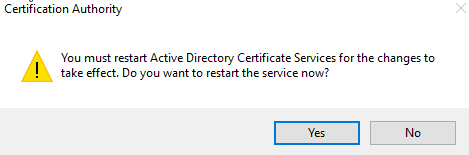
A warning will appear, prompting to restart the Active Directory Certificate Services, click yes.
Signing a document digitally
On client machine in eihstore.com domain, open RUN and type mmc. In console, go to file and click on Add/Remove snap-in.
In Add or Remove Snap-in, select Certificate and click on Add.

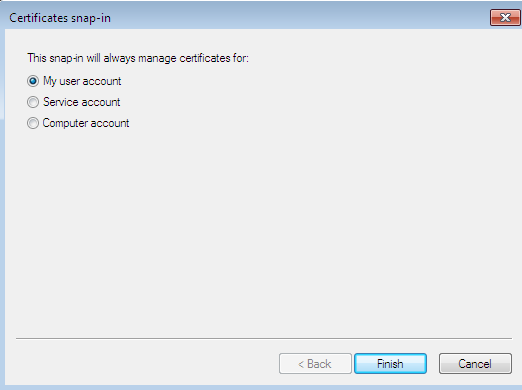
In certificates snap-in, select My user account and click finish.
In Add or Remove snap-ins, click OK.
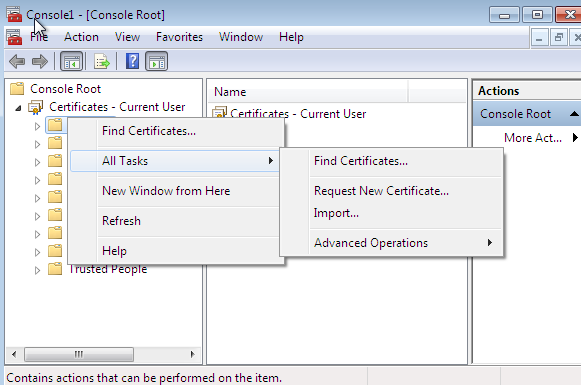
In Certificate console, expand Certificates, right click Personal and select All Tasks and Request New Certificate.
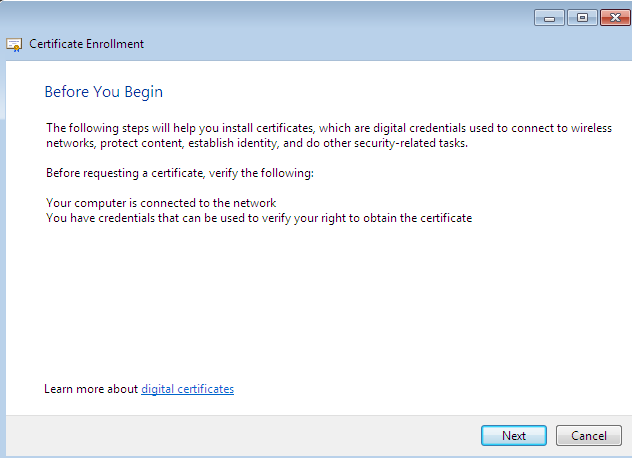
In Certificate Enrollment Wizard, click next.
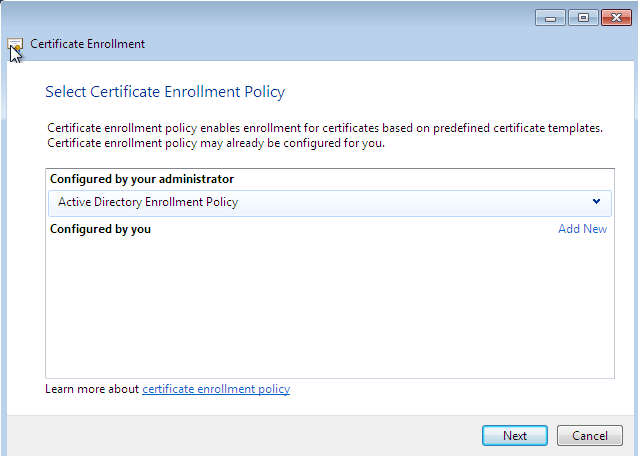
In Select Certificate Enrollment Policy, click next.
In Request Certificate, select Administrator and click Enroll.
In Certificate Installation Results, click finish.

Close Certificate console.
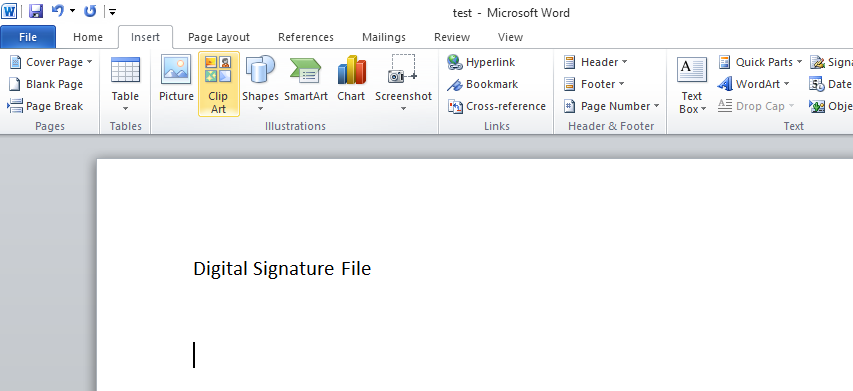
Open Word and type some text in a blank document and then save the document. Click Insert on the ribbon and then click the signature line.
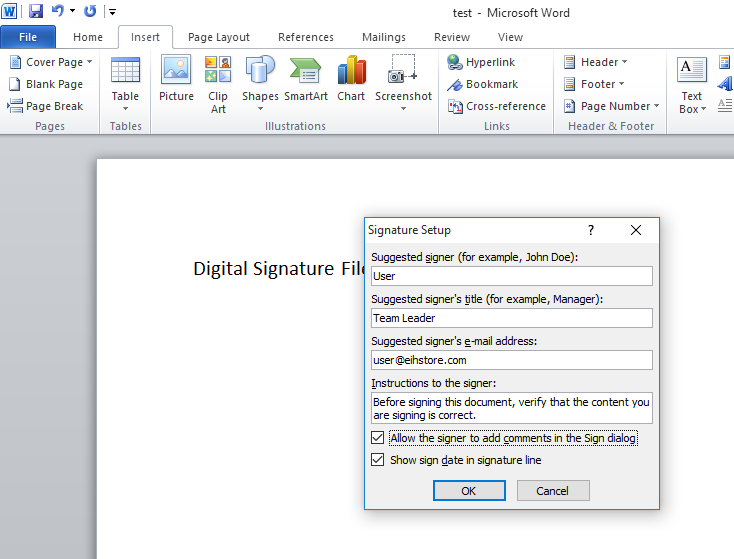
In Signature Setup, specify the Suggested Singer, Suggested Singer’s title, Suggested Singer’s e-mail address, and select Allow the signer to add comments in the Sign dialog and click Ok.
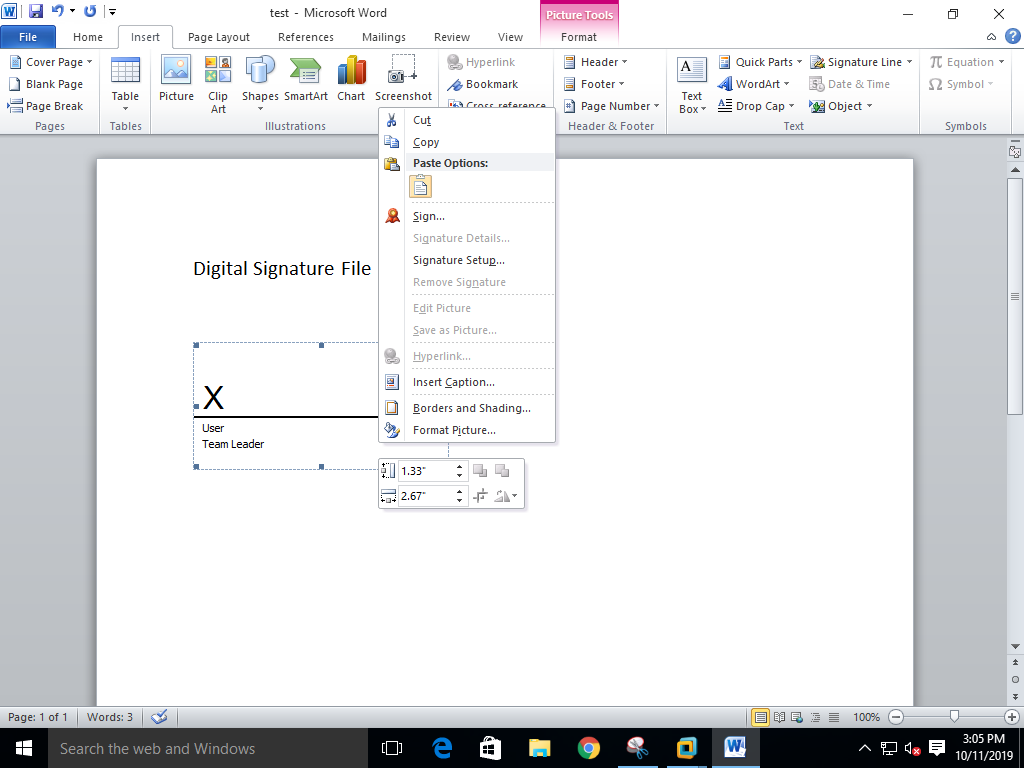
Right click the created signature and select Sign.
In Sign, add the signature image and click on Sign.
On Signature Confirmation, click OK.
Make sure that the document cannot be edited anymore.
Grammarly – Best Free Grammar checker | Spelling checker | Mistake-free document writer for Laptop/Desktop
Online Surveys – Earn Real Money by Online Surveys
Kids Books – 10+ books for Kids | Age group 2 – 10 | Improve knowledge & Productivity